5 Essential Tips to Optimizing Your Home Recording Studio

Having a home recording studio is crucial for aspiring musicians who want to break into the industry. There's something special about composing melodies and rhythms within the comfort of one's room.
However, producing industry-standard tracks without the resources of a professional recording studio is a hurdle that haunts most beginners. Mastering and optimizing your space's acoustics is a game-changing advantage you can pull off.
This article will explore six valuable tips to enhance your home recording studio acoustics and physical setups.
5 Tips to Improve Your Home Recording Studio Acoustics
Historians believe the first music studio to be Thomas Edison's lab in 1877. Since then, musicians would seek similar technologies to tinker with and capture sound.
Digital audio workstations (DAW) like Logic Pro and Pro Tools allow artists to build home recording studios quickly.
Nonetheless, acoustics optimization remains a crucial aspect of recording music. As a scientific study of sound, acoustics encompasses the production, transmission, and sound waves' interaction with the environment.
Here are five tips to help you make your home studio recording and acoustics sound pro-built.
1. Evaluate and Adjust Acoustics
Understanding your room's acoustics is the first step in creating an excellent recording space.
Identify issues like excessive reverberation, standing waves, or flutter echoes. Also consider your room's measurements, materials, and furnishings that affect sound reflections.
The following will help solve the acoustics issues mentioned above:
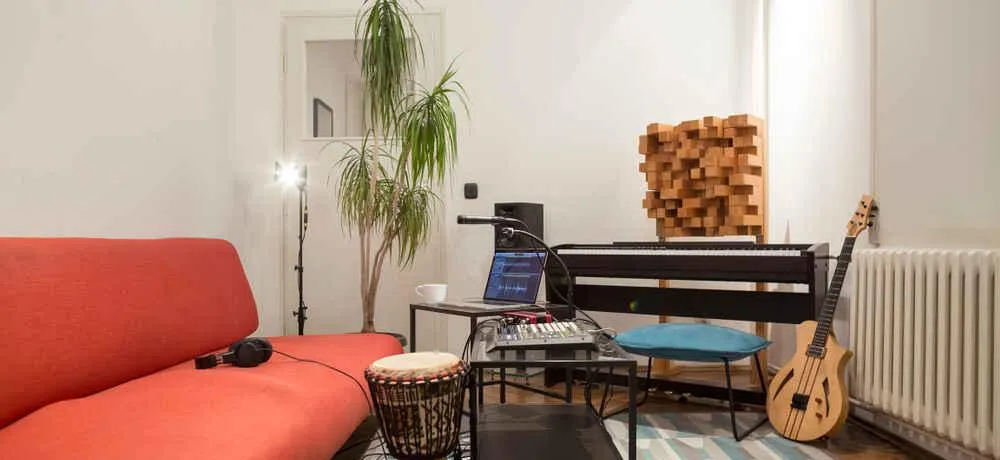
- Reduce Reflections: Incorporating home recording studio acoustic panels or diffusers effectively minimize sound reflections. Install them on the walls and ceiling to diminish standing waves and absorb excess reverberation. Be mindful of areas around your recording equipment and listening position.
- Arrest Low Frequencies: Bass energies are most pronounced to address low-frequency sound waves. Place bass traps in corners or near walls. These specialized acoustic treatment devices can enhance sonic clarity by absorbing and diffusing bass energies and reducing standing waves.
- Place Treatments Strategically: Tinker with your home recording studio acoustic treatment's placement. Position acoustic panels and bass traps at primary and major reflection points where sound bounces off the walls directly.
2. Optimize Home Studio Speaker Placement
Proper placement of studio monitors improves the listening experience and helps artists create excellent mixes. Applying the following tips could be simple yet tremendously beneficial for your home recording.
- Make a Speaker-Listener Triangle: Churn out more balanced stereo images and minimize phase cancellation issues using this equipment pattern. Do this by arranging your speakers and listening position emulating an equilateral triangle.
- Steer Clear from Obstacles: Position speakers away from reflections and bass buildup-causing obstacles like walls, corners, or large objects. Find the sweet spot by experimenting with positions. This strategy provides optimal images for your mixes.
3. Apply DIY Treatment Alternatives

Inherent home recording problems like room modes influence the frequency response of a room. These detriments to effective frequency ranges often require expensive devices or treatments.
However, if investing in commercial acoustic treatment options is out of your budget, exploring DIY alternatives can also provide better results.
- Install DIY Absorption Panels: Mineral wool, fiberglass, and similar insulation materials are workable as acoustic panels. Using wooden frames and covering these DIY panels with acoustically transparent fabrics makes them effective reflection reducers.
- Use What You Have: Books, furniture, and soft furnishings help absorb sound reflections and improve your space's overall acoustics. Using heavy curtains aid in breaking up parallel surfaces, minimizing flutter echoes, and addressing room modes.
4. Choose the Best Devices
Minimizing unwanted noise and maximizing audio clarity is critical for recording vocals or instruments. To achieve optimum sound quality for your recordings, consider the following tips:
- Mind Your Mic: Prioritize sound-appropriate microphones that offer features to reduce room reflections. Dynamic microphones like Shure SM57 are ideal for isolating sound sources resulting in clear recordings.
- Use High-Quality Tools: An audio interface with superior preamps and converters accurately captures audio sources. This produces cleaner and more professional recordings. Pairing them with well-insulated XLR cables to preserve audio signals' frequency range translates into more detailed results.
5. Test Different Acoustics and Playback Systems
Refrain from settling with a single playback system. Test your mixes using various listening systems like headphones, earbuds, and stereos. Observe how your recordings perform against the backdrop of different acoustic environments and adjust as needed.
Reproduce Music Professionally
Implement these simple improvements in your home recording studio to achieve the best results. Continue to work on your craft and experiment with sounds to give your listeners the best version of your music.
Bison Disc can help in your pursuit of music dominance. Explore our range of products and services for reproduction and packaging needs. Ready to get started? Start your order today.